
How to Repair Dry Rot Wood (and Protect Your Home Long Term)
Dry rot has a way of hiding in plain sight.
It often starts quietly, behind trim, under paint, or near areas exposed to moisture. By the time it becomes obvious, the damage can already be affecting the strength of the wood underneath.
The good news is that dry rot does not always mean extensive demolition or major reconstruction. When addressed early and repaired correctly, it can be stopped and fixed for good.
This guide explains how dry rot works, how to identify it, when it can be repaired, and when replacement is the safer option, based on real-world experience repairing homes in moisture-heavy environments like Portland, OR.
What Is Dry Rot and Why Does It Happen?
Dry rot is one of the most misunderstood forms of wood damage in homes. Despite the name, it has nothing to do with wood drying out. In fact, dry rot is caused by excess moisture, and it spreads because that moisture goes unnoticed or unresolved.
What is dry rot?
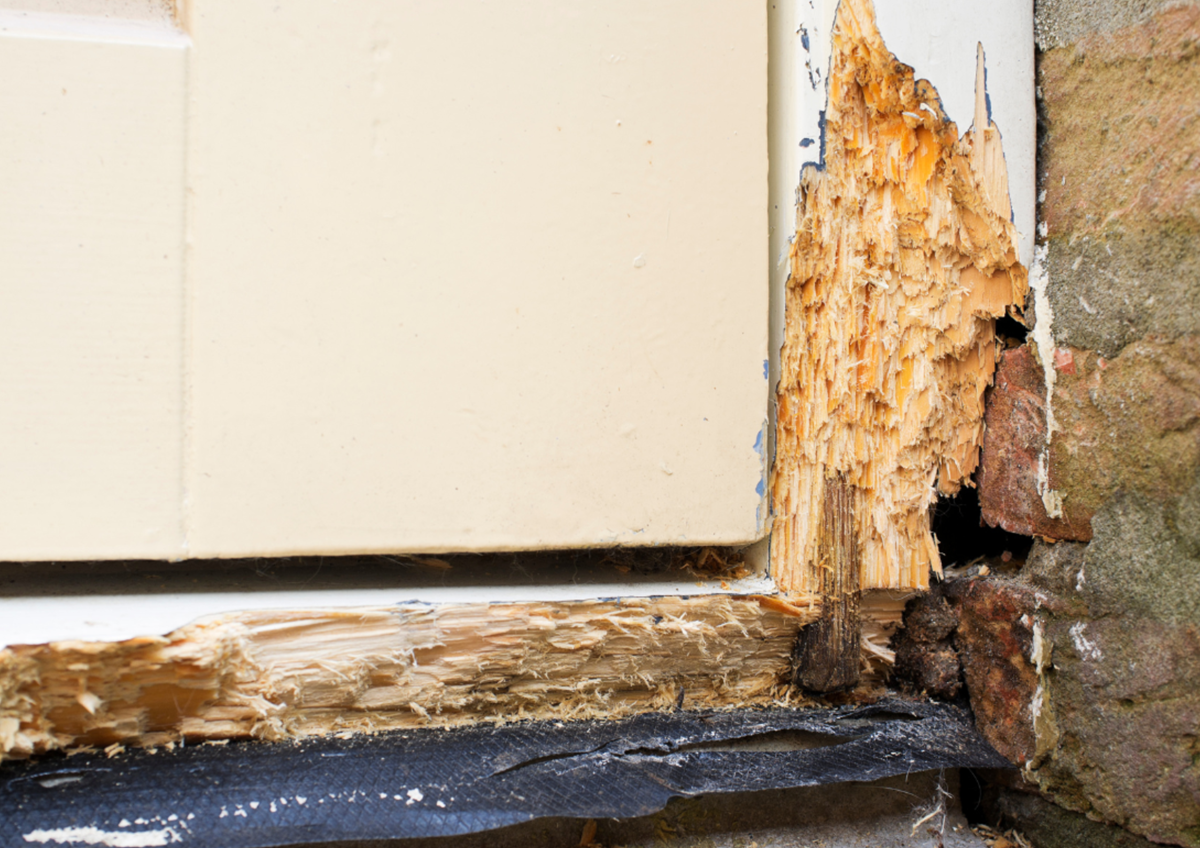
Dry rot is a type of fungal decay that feeds on the cellulose in wood. When moisture levels stay high long enough, fungi begin to break down the wood’s internal structure. As the fungus spreads, the wood loses strength, becomes brittle, and eventually crumbles.
What dry rot is not:
It is not surface mold
It is not caused by dry conditions
It is not something paint or filler can fix on its own
Wood affected by dry rot may look intact at first, but internally it can be severely compromised. That’s why cosmetic repairs often fail when the underlying issue hasn’t been addressed.
Conditions that allow dry rot to develop
Dry rot does not appear randomly. It needs very specific conditions to survive and spread.
The most common contributors include:
Persistent moisture, usually from leaks or condensation
Poor ventilation, especially in crawl spaces and enclosed framing
Water intrusion, caused by failed flashing, damaged siding, or roof issues
Wood-to-ground contact, which allows moisture to wick upward
Once moisture is present, fungi can spread through wood fibers and even across masonry surfaces to reach new areas of wood. This is why dry rot often extends beyond what’s visible on the surface.
How to Repair Dry Rot Wood Step by Step
Dry rot repair has one non-negotiable rule: fix the moisture problem first, or the repair will fail.
The second rule is just as important: remove all compromised wood until you reach solid material. Anything left behind can keep spreading.
The steps below outline the safest, most reliable way to repair dry rot wood, with clear notes on when a repair is appropriate and when replacement is the right call.
Step 1: Find and fix the moisture source first
Dry rot is a symptom. Moisture is the cause. If you repair the wood without stopping water intrusion, you’re basically rebuilding the same problem.
Start by identifying where moisture is coming from. Common sources include:
Leaking gutters or downspouts dumping water against siding
Failed caulking at windows and doors
Missing or incorrectly installed flashing
Roof leaks dripping into wall cavities
Poor grading that pushes water toward the home
Condensation from poor ventilation in bathrooms, kitchens, or crawl spaces
Quick checks that often reveal the issue:
Look for staining, bubbling paint, and soft drywall near the rot
Check for gaps where trim meets siding or windows
Inspect gutters for overflow marks and sagging sections
Look for wet soil or pooling water near the foundation after rain
If you can’t confidently find the moisture path, stop and get professional eyes on it. Dry rot repairs go sideways when homeowners treat what they can see while water keeps entering from somewhere else.
Step 2: Confirm the extent of the damage
Dry rot often spreads beyond the visible area. Before you start cutting, you need to know how far it goes.
Use a screwdriver or awl to probe the wood:
Healthy wood resists pressure and feels firm
Dry-rotted wood gives easily, flakes, or crumbles
Hollow sounds when tapped can indicate internal decay
Check the surrounding areas too, especially:
Behind trim boards
Under window sills
Along bottom edges of siding
Around deck ledger boards and posts
Near door thresholds
If the damage appears structural or widespread, repair work may require partial demolition to expose framing. At that point, replacement is considered more appropriate than patching.
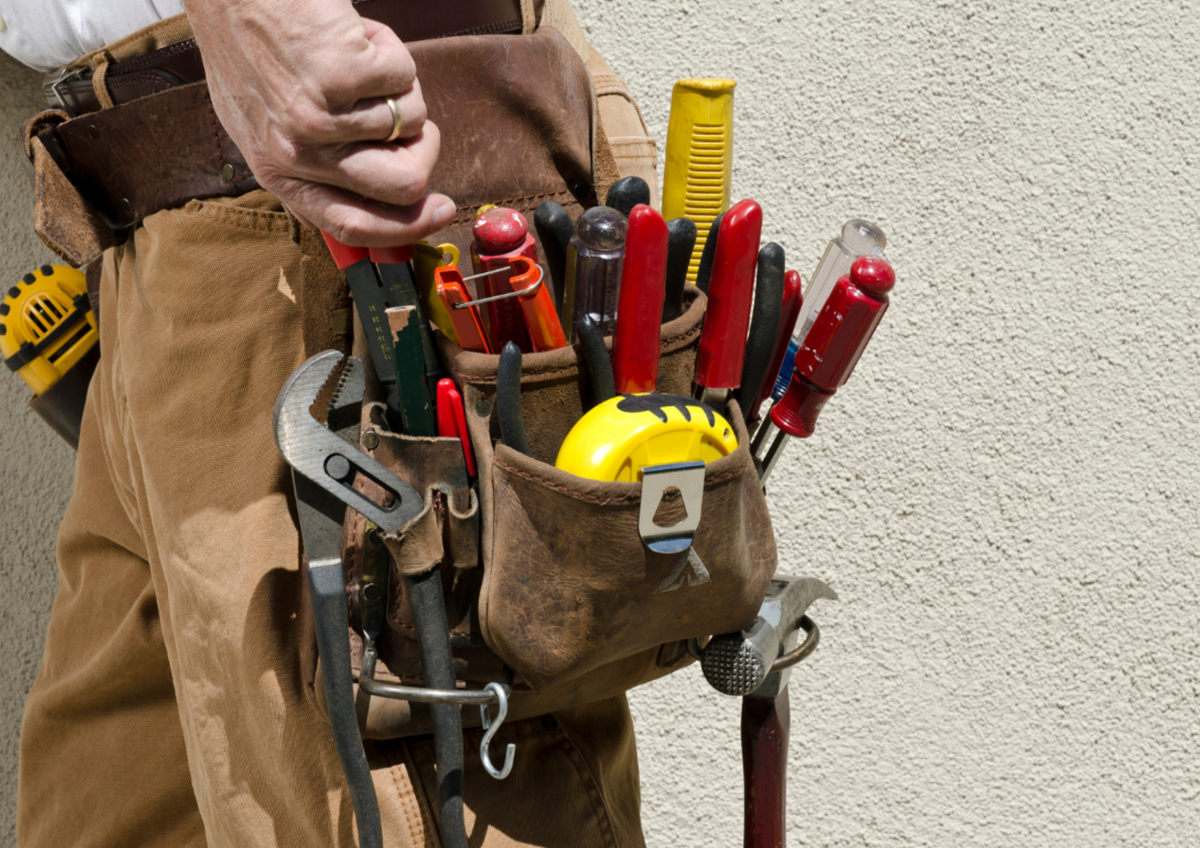
Step 3: Set up the area and work safely
Dry rot repair is messy. You’ll be cutting out damaged wood, sanding, and often working with chemical treatments.
Basic safety practices matter:
Wear gloves, eye protection, and a respirator or dust mask
Protect nearby surfaces with plastic sheeting
Remove nearby items that could be damaged by dust or debris
If the rot is near wiring, plumbing, or openings into wall cavities, shut off power or water as needed
If you discover signs of pests, heavy mold growth, or deep structural damage, pause the work. Those situations change the repair plan.
Step 4: Remove all rotted wood until you reach solid material
This is where many repairs fail. People remove the obvious soft area, then patch over what remains. Dry rot continues spreading because it was never fully removed.
Cut, scrape, and chisel back the damaged area until the wood is firm and resists pressure, the edges are clean and stable, and no crumbly or dark, spongy material remains.
For trim, fascia, or siding, this may mean removing and replacing entire boards rather than trying to repair a corner.
For structural areas, removal should continue until the wood is unquestionably sound. If you are dealing with framing or load-bearing elements, this is not a place to guess.
Step 5: Dry the area completely
Dry rot needs moisture to survive. After removal, the area should be allowed to dry before rebuilding.
That might mean:
Leaving the area open for a day or more
Using fans and dehumidifiers
Improving airflow temporarily
If you rebuild over damp material, you trap moisture inside the repair and create the conditions dry rot thrives on.
Step 6: Treat surrounding wood to prevent regrowth
Once the rotted wood is removed, treat nearby wood to reduce the chance of fungal activity returning.
This is where homeowners often misuse products, so here’s the proper role of treatments:
Fungicidal treatments help kill spores in surrounding wood
Wood hardeners strengthen slightly softened wood, but they are not a structural fix
Epoxy consolidants/fillers rebuild missing sections for non-structural repairs
Treatments are most useful when the remaining wood is solid but you want extra protection in an area that was previously compromised.
If the remaining wood is soft or structurally weak, do not treat. Replace it.
Step 7: Rebuild the damaged area with the right method
This step depends on what you’re repairing.
Option A: Replace the wood (best for most cases)
Replacement is usually the most durable repair, especially for trim, fascia, siding, thresholds, and framing. New wood eliminates hidden decay and gives you a clean foundation for sealing and painting.
Option B: Epoxy repair (best for small, non-structural areas)
Epoxy can be appropriate for localized damage, such as:
Small areas of window trim
Decorative trim profiles where full replacement is difficult
Minor rot where the surrounding wood is solid
A proper epoxy repair involves:
Clean removal of rot
Treatment and drying
Applying consolidant
Rebuilding with epoxy in layers
Sanding and shaping after curing
Epoxy is not a shortcut. It only works when the prep work is thorough.
Step 8: Seal, flash, and protect the repair
This step is what keeps your repair from becoming a repeat issue next winter.
Key protections include:
Proper priming and painting of all exposed wood surfaces
Sealing end grain, joints, and seams where water enters first
Installing or correcting flashing above windows, doors, and trim
Using high-quality exterior sealant in the correct locations
Confirming gutters and downspouts direct water away from the repair area
A lot of dry rot comes back because water was allowed to hit the same spot again. A good repair is always paired with better water management.
Step 9: Check your work over time
Dry rot repair is not something you “set and forget,” notably in moisture-prone areas.
A simple seasonal habit helps:
Inspect the repaired area each fall and spring
Watch for caulk separation, paint failure, or staining
Keep gutters clean and water flowing away from the home
If the repair was done correctly and the moisture problem is solved, you should not see the issue return.
DIY Dry Rot Repair vs. Hiring a Professional
Dry rot repairs sit right on the line between reasonable DIY work and projects that can go very wrong if handled erroneously. The key difference is not confidence or tools. It’s understanding the role the damaged wood plays and how far the problem extends.
When a DIY repair may be appropriate
Some dry rot repairs can be handled by a careful homeowner, as long as the damage is limited and non-structural.
DIY repair may make sense when:
The rot is confined to exterior trim, fascia, or decorative elements
The affected area is small and easy to access
The underlying wood is solid once damaged material is removed
The moisture source is obvious and fully corrected
In these cases, replacing trim boards or repairing small sections with proper preparation, treatment, and sealing can be effective. The work still needs to be thorough, but the risk is lower because the repair does not affect the home’s structure.
When hiring a professional is the safer choice
Dry rot quickly moves out of DIY territory when structural integrity or hidden damage is involved. This is where experience matters most.
A licensed handyman for home repairs should be involved when:
Framing, beams, joists, or rim boards are affected
The rot is spreading behind walls, siding, or windows
Multiple areas show signs of decay
The moisture source is unclear or difficult to access
Repairs require temporary structural support
Professionals know how to open up assemblies safely, determine the full extent of the damage, and rebuild correctly. They also understand how to protect the repair so it does not fail a few seasons later.
The risks of improper dry rot repair
Improper repairs often look fine at first. The problems show up later.
Common consequences include, rot returning because moisture was never stopped, structural weakness that worsens over time, higher repair costs when the issue spreads, failed inspections during a sale or refinance, etc.
Dry rot does not improve on its own. When it is repaired incorrectly, it becomes more expensive and more disruptive to fix later.
Knowing when to step back and bring in a professional is protecting your home from repeat damage and unnecessary risk.
Other Frequently Asked Questions (FAQs)
How to repair dry rotted tires?
Dry rot in tires cannot be repaired safely. Cracked or dry-rotted tires have compromised rubber and should be replaced. Any attempt to seal or soften the rubber does not restore structural integrity and creates a serious safety risk.
Can you repair dry rot leather?
Dry rot in leather is not truly repairable. Conditioners may improve appearance temporarily, but once the fibers break down, the damage is permanent. Replacement is usually the only long-term solution.
How much does dry rot repair cost?
Dry rot repair costs vary widely based on location, extent of damage, and whether structural elements are involved. Minor trim repairs may cost a few hundred dollars ($150–$1,000), while structural repairs involving framing, windows, or decks can run several thousand ($1,000–$4,000), and potentially over $10,000+. The biggest cost factors are access, labor, and how much wood needs replacement.
How to repair dry rot in a door frame?
Door frame repairs depend on severity. Minor surface rot can sometimes be repaired by removing damaged wood and rebuilding the area with epoxy. If the rot extends into the framing or compromises how the door operates, full replacement of affected sections is the correct approach.
How to repair dry rot eaves?
Repairing dry rot in eaves usually involves removing damaged fascia or soffit boards and replacing them entirely. Moisture sources like roof leaks, failed flashing, or poor ventilation must be corrected first or the rot will return.
How to repair dry rot floor joists?
Dry rot in floor joists is a structural issue and should be handled by a licensed professional. Repairs typically comprise replacing affected sections or sistering new joists alongside damaged ones after eliminating moisture sources. Cosmetic repairs are NOT appropriate in this situation.
How to repair dry rot in a window sill?
Window sill repairs depend on how deep the rot goes. Shallow damage may be repaired with epoxy after proper removal and drying. Deeper rot either requires partial or full sill replacement, along with correcting flashing or drainage issues around the window.
Stop Dry Rot Before It Gets Worse With Revive Works Remodeling.
Dry rot is one of those problems that rarely fixes itself and almost always grows when ignored. The key is understanding what you are dealing with, removing all compromised material, and eliminating the moisture that allowed it to start in the first place.
If you suspect dry rot in your Portland home or want a professional assessment before the damage spreads, reach out to Revive Works Remodeling and let’s take care of it the right way.